

Contents of the Manual
- Initial Assembly
- Hose Cleaning
- Start and Stop
- Rotation Speed and Direction
- Suction Power
- Favorite Settings
- Replacing the Vacuum Bag
- Replacing the HEPA Filter
- Mounting the Freestanding Handpiece Holder
- Disinfection Mode
- Replacing the Interchangeable Chuck Head
1. Nova SE - Initial Assembly
Securely Assemble the Lid, Motor Cable, and Suction Hose
Follow the steps below to install the lid, motor cable, and flexible suction hose safely and correctly. This ensures optimal functionality for your device.
- Remove the lid from the main unit.
- Detach the insertion tube from the lid.
- Pass the motor cable connector through the opening in the panel.
- Screw the suction hose onto the lid.
- Insert the motor cable connector into the lid guide from above. Do not push the connector from the side.
The connector is properly inserted when the locking tab clicks into place. - Place the insertion tube onto the opening in the lid.
Pay attention to the orientation of the insertion tube: The insertion tube has a notch for the motor cable. - Slide the lid together with the attached hose into the main unit.
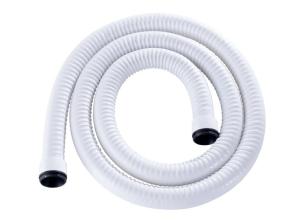
2. Nova SE - Hose Cleaning
How to Clean the Flexible Suction Hose
The display shows a reminder to clean the inside of the flexible suction hose. You can set the timer to a value between 5 and 35 operating hours. You can also turn off the reminder completely. Press Clear to close the message. Then disassemble and clean the hose by placing it in a disinfection bath for a maximum of 15 minutes.
3. Nova SE - Start and Stop
You have two options to start and stop your Nova SE:
You can start and stop it manually or activate the automatic start/stop function. This feature automatically stops the handpiece as soon as it is placed in the holder and restarts it when removed. This eliminates the need to look for and press buttons, allowing your workflow to remain uninterrupted. A handpiece holder is required for the automatic start/stop function to work.
4. Nova SE - Rotation Speed and Direction
Optimal Speed for Safe Operation
Never work at a speed too high for the instrument. Working with grinders over 7mm in diameter can damage the device's motor. High speed combined with a smaller grinder is healthier for the motor than heavy pressure combined with a larger grinder.
Speed Setting
The displayed number multiplied by 1000 gives the current speed in revolutions per minute.
Direction of Rotation Setting
You can select the direction of rotation before turning on the handpiece motor or while the motor is running.
5. Nova SE - Suction Power
Adjust Suction Power – for Hygiene and Longevity
Operate with high suction power as long as possible and only completely turn off the vacuum function when absolutely necessary. High suction power keeps the room air clean and reduces the risk of transmission of potentially pathogen-loaded particles and grinding dust. High suction power also keeps the device cool and increases its lifespan.
6. Nova SE - Favorite Settings
Create Favorites – Quick and Individual
Creating favorites is simple and convenient. All important values related to a specific instrument can be defined.
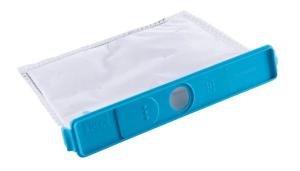
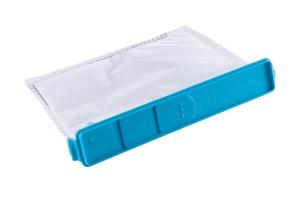
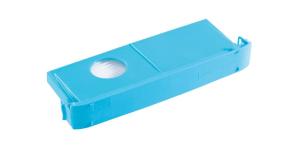
7. Replace the Vacuum Bag – for Maximum Suction Power and Hygiene
The vacuum bag should be replaced when it is 80% full. From this level, the device's suction power gradually decreases. An initial warning is displayed when the bag is 60% full, giving you plenty of time to plan the replacement. When the bag reaches 80% full, an additional warning appears. Replace the vacuum bag at the latest when it is completely full (100%). One bag lasts up to 150 treatments.
Keep in mind:
Use only original vacuum bags. Each bag may only be used once. Never empty bags for reuse. Use an appropriate respiratory mask when changing the bag to minimize the risk of infection from potentially pathogenic grinding dust.
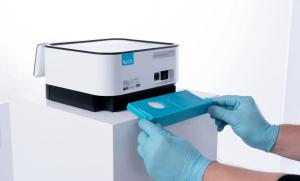
Replacing the vacuum bag while the device is turned on
You can replace the vacuum bag while the device is on, but the handpiece motor must be off. The display will then show step-by-step prompts – follow these instructions. After the lid is replaced, the message "Filter change: Vacuum bag" will appear. Confirm whether the filter has been changed.
8. Replacing the HEPA Filter – Ensures Optimal Suction Power and Safety
The HEPA filter should be replaced when the device has reached 390 operating hours. After this, suction power gradually decreases. From 370 operating hours, the device displays a first message (Replacement Message 1), giving you plenty of time to plan the replacement. When 390 operating hours are reached, an additional message is displayed (Replacement Message 2). Replace the filter no later than after 400 operating hours.
Keep in mind:
Use only original HEPA filters. Each HEPA filter may only be used once. Use an appropriate respiratory mask when changing to minimize the risk of infection from potentially pathogenic grinding dust.
Replacing the HEPA filter while the device is on
You can replace the HEPA filter while the device is on, but the handpiece motor must be off. The display will then show step-by-step instructions – follow these throughout the process. When you have completed and confirmed the replacement, the HEPA filter operating hour counter will reset to 0.
Replacing the HEPA filter when the device is off or the display inactive
If you replaced the HEPA filter while the device was off or the display was inactive, the replacement was not recorded. If more than 400 operating hours have passed since the last confirmed replacement, the message "HEPA filter is full" will be displayed the next time you turn on the device or activate the display. You can reset the counter by answering yes to the question about a completed filter replacement.
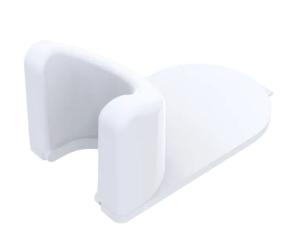
9. Attach the Handpiece Holder to Any Surface
Attach the handpiece holder to any surface using the tape. Simply follow our step-by-step instructions in the video.
10. Nova SE - Disinfection Mode
Disinfection Mode – Safe Cleaning of the Display
The disinfection mode locks the screen for 60 seconds. During this time, you can clean or disinfect the screen. While the lock is active, the remaining lock time (in seconds) is displayed.
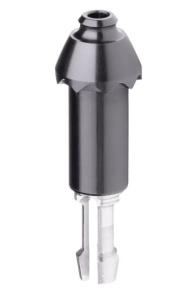
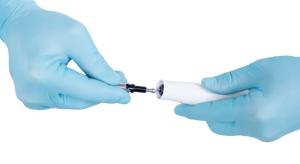
11. Replacing the Chuck Head – Maintains Functionality and Safety
After prolonged use, the interchangeable chuck can lose its ability to hold the instrument securely. This may cause the instrument not to rotate when the handpiece motor is turned on or make it impossible to insert the instrument into the chuck. This performance degradation is normal and not a basis for complaint.
If the chuck no longer functions, it can be easily replaced. To extend the lifespan of the interchangeable chuck, use only suitable and undamaged instruments.
If the handpiece receives hard impacts or if it is operated without an instrument in the chuck, the chuck head can be damaged.
Keep in mind:
When replacing the interchangeable chuck head, contaminated dust particles may be released. Therefore, use appropriate mouth and nose protection. Disinfect the work surface and device afterward with a suitable surface disinfectant.
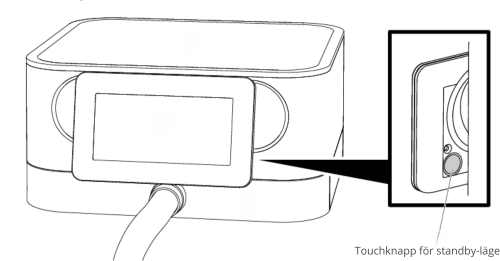
12. Touchknapp för standby-läge – väck och släck displayen med en enkel touch
Om apparaten inte har använts under 30 minuter blir displayen svart och apparaten skiftar till standby-läge. Efter att touchknappen på baksidan av displayen har rörts vid är apparaten aktiv igen. Det går också att aktivera standby-läget med samma touchknapp.
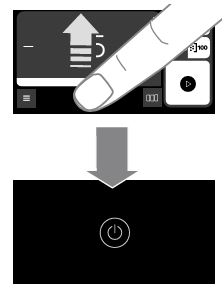
Tänk på:
Du kan även aktivera standby-läget med en gest: Svep uppåt från den undre kanten av displayen. Detta fungerar oavsett vilken bild som för tillfället visas.
JavaScript seem to be disabled in your browser.
You must have JavaScript enabled in your browser to utilize the functionality of this website.